Wednesday, September 4, 2013

Special Need Dolls

I recently filled an order for a childrens hospital in North Carolina for 6 dolls with specific special needs.. Thought I'd add some pics in case anyone is wondering if a doll could be made for your own special angel with one of these special needs... 


This doll has an omphalocele... An omphalocele is a birth defect in which the infant's intestine or other abdominal organs stick out of the belly button (navel)


Her omphalocele is securely sewn in place. If could actually be removed at a later date is desired...

This doll has a feeding tube as well as a trach tube... I can insert either, but customers will need to send me one to use, as I have no way of getting them myself... I can also make "pretend" ones using craft foam if you don't want the real thing added to your doll...

 I sew around the "incision" really well in order to keep the feeding tube in place.. Rather than fill the bulb with water, I fill it with air, so there's no chance of the doll's stuffing getting wet... You can easily add more air if ever necessary...

 This sweetie is a Down Syndrome doll with hearing aids in both ears..Her eyes are a little slanted and oval shaped, her face is a little rounder than the other dolls and a bit flatter from the side... 
Hearing aids are attached with velcro and can be removed if wanted for bedtime :o) The dolls don't normally have ears, but if you want your doll to have ears to go along with the hearing aids, I'm glad to add them.. 


 This baby doll is a little boy doll with hydrochephalus, a shunt and a much larger than normal head...

 His shunt is located at the top of his head along with his scar, and his tubing runs down the side of his chest and tummy, ending at the scar point... The shunt and tubing can be felt under his "skin"...


This cutie patutie has one shorter than normal leg.. His foot is located just beneath his knee on one leg... 


And last, another hydro boy, this one with a just slightly larger than normal head.. I thought I had taken a picture of his tummy tube, but can't locate it.. But he has a tube running down his chest and tummy ending at the scar location.. His shunt and horeshoe scar is located on the back of his head and can be felt through his hair...

I'm always willing to try to recreate any special needs your child may have.. If you are wondering if a special need you would like added to a doll can be incorporated, please email me at karen @ karenskids.net (no spaces) and ask.. Pictures always help me to visualize what I'd need to do, so feel free to send me pics!

You can read more about my Special Angel dolls at www.specialangeldolls.com or go to Custom Ordered Special Angel Dolls.  
Dolls are available in either 16" or 20" sizes..

Tuesday, April 23, 2013

Dolls with shunts, or Hydrochephalus dolls...

Some of my favorite doll orders are for Special Angel Dolls.. These are dolls made with special features to match a child's special needs.
This cutie is a shunt doll. Her shunt is in the back left side of her head with the tube running down the left side of her chest and the belly scar to the left of her belly button.

I started making the Special Angel dolls about 7 or so years ago..It really wasn't my idea, but rather a very sweet Mom who wrote and asked me if I could put a shunt in a doll.. I didn't even know what a shunt was! This mom was super helpful and gave me all kinds of info on them, gave me links to websites that would help me understand them and answered every question I had.. 
The very first shunt doll I made was for this little sweetheart.  

I will always remember this little girl as the start of the Special Angel Dolls ;o)

My husband and I started going through craft stores and Home Depot looking for supplies I could use.. I took a bit to figure it all out, but this Mom sure made it easier with all her wonderful help! 
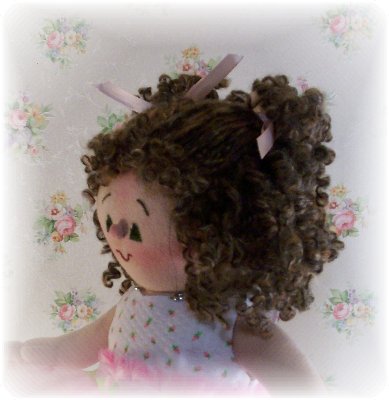
This cutie has beautiful eyes and wears glasses, so her doll does , too.
Her shunt bump and scar are in her hairline, so her doll's is, too.

Before long, I received another order for a shunt doll, then another and another... Now, 7 years later, I've made so many hydrochephalus dolls, I've lost count.. 

I had a company who supplies shunts to hospitals write and ask if I could make a doll with an actual shunt and tubing (they provided).. They asked if I could add some sort of clear fabric down the front of the doll and on the back of the head showing what the system looked like... They wanted this doll to use as an educational tool for children who were about to have one surgically implanted..  I used a clear sewable vinyl product to sew a "pocket" to slide the shunt and tubing in so it was visable.. I wish I had a picture of that doll, but unfortunately, it crashed along with my computer....

But that doll was actually incredibly helpful to me because I got to feel what a real shunt looked like before it's inserted in the head, plus I got a feel for the tubing.. Wonderfully helpful experience!


One of my fondest memories is of a large group of Hydro dolls that traveled to Sweden to their new homes. A woman who's son had a shunt contacted me and asked if I'd be willing to make dolls for each child in their Hydro group.. Her name is Merja and I still hear from her from time to time.. What a great experience! 

I attempted to add a sign in Swedish on the side of the box declaring the box to be fragile and handle with care.. I'm not sure what I actually wrote, but Merja did seem to find humor in whatever it was.. She never did tell me what it actually said.. 

The internet has sure made our world a lot smaller.. If it weren't for the internet, I never would have met so many wonderful people from all over the world.. It's been a wonderful ride!

Each shunt doll has the shunt bump on the head, in the back, on the top, in the hairline, on the right or on the left, where ever it's actually located on the real doll :o)  There's a tube running down to the neck from the shunt and continuing down the front of the chest to the tummy, where a scar is placed to match the child's scar.  The shunt bump can be felt through the doll's "skin" on the head and the tube running down the front can also be felt and seen slightly.. A scar is also added to the shunt bump area, usually in the shape of a horseshoe, unless another shape is requested.. In short hairdo's, like the one shown below,  I can add the scar through the hair... I try to work with whatever the customer would like.. As long as it's something I can work with, I'm more than willing to try.. 

Shortly after I was asked to make a hydro doll, I started receiving requests for dolls with missing limbs, then on to prosthetics, scars from surgery's, hearing aids, cochlear implants and more.. 

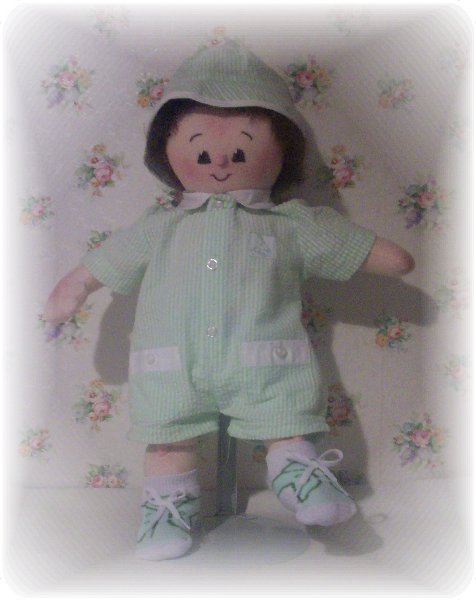
This is Lil Owen.. He's a shunt doll and was donated to the Children's Healthcare of Atlanta at Scottish Rite
If you see him there, give him a hug for me :o)


I very much believe that people cross our paths for a reason.. I feel so incredibly blessed to have had that wonderful Mom cross my path 7 years ago and ask me if I could make a shunt doll...
She started me on this particular journey and I'll be forever grateful to her. 

I've had a lot of people writing me asking questions about the Special Angel Dolls. 
You can get lots of info from my website:
Karens Kids or/and
from the Special Angel Page.
Ordering info can be found here:

But if you still have questions, feel free to email and ask ;o)
karen @ karenskottage.org (no spaces)


Saturday, April 13, 2013

Doll Making


Good morning! My name is Karen Challender and I've been making dolls for over 30 years.. I first made dolls for my children way back in 1981.. Michigan was in a recession and money was a bit tight, so I made dolls for my kiddo's for Christmas. I made each doll to resemble them wearing pj's and a housecoat, then I made my children the same outfit. What started as a gift idea grew into my small doll business, but it took years to get here.

Two of my sisters were very supportive and kept telling me I needed to try selling my dolls. I started creating dolls left and right and ended up with a closet just off our kitchen full of  nothing but dolls.. But now what? Back then, there wasn't the internet, I didn't have money to open a craft shop and a few ads in the paper I ran didn't generate any business. 

So, one of my sisters and I started going to craft shows. She sold really unique purses she made and I sold my dolls.. Some of the shows were very productive, most were not.. We got a lot of great compliments, but Michigan was in a recession, and no one had money to spend on extras...We soon discovered how iffy craft shows can be and after about a year or so, we just kind of moved on... 

Eventually, we both ended up working outside our homes.. For me, I still made dolls off and on, some for my neices and nephews, some to donate at Christmas time, my youngest sister suggested I do a craft show on her airforce base, she took a couple of orders for me from time to time...I worked for an insurance salesman who knew he wasn't paying me enough (lol) so he suggested I bring some dolls into the office to display them and maybe get some sales.. I did, and they sold.. But living in a very small rural town, there just really wasn't a way to get them out there.. 

Back then, in the 80's, it was really hard to find good fabric to use for the dolls skin.. I remember going into a dime store once in Angola, Indiana to look at fabric.. They had a variety of fabric for sale, folded on a table.. I found a piece of perfect fabric, perfect skin tone, it was soft and not too stretchy.. It didn't have a name on it, but I suspect it was probably an early version of craft velour.. I bought all they had and used it for years, always looking for more, but never able to find any.. I still have one doll made from that fabric.. 

Years went by, I worked in office positions for over 20 years, all the while wishing I could make a living being creative, not sitting behind a desk doing endless paperwork and eventually staring at a computer all day long.. 

I was still making dolls here and there, selling them from time to time, but never enough to ever consider leaving a stable job to pursue a career of selling crafts.. 

In the early 1990's, I decided to rent a booth at a craft/antique shop for $15 a month, plus a commission charged on each sale..For this the owners were to take care of the booth, the sale of items, and send me a check every month for anything I sold.. It took a few months, but suddenly a check showed up in the mail.. I made a few more dolls, took them to my booth and waited for another check.. 

I never received another check and after 6 months or so, decided it wasn't worth the $15 a month, so I went to clear out my booth, only to discover all my items had been sold, the original owners had sold the craft/antique store to someone else and taken my money with them. 

Hard lesson to learn, but from then on, I knew if I was going to sell my crafts, I was going to have to figure out a way to do it myself. 

In 2000, I remarried a wonderful, kind and loving man who understands my desire to be creative.. I made the decision to leave Corporate America behind and figure out a way to do what I really love to do for a living... 

I decided to create a website.. Why I thought I could do this, I do not know.. I knew NOTHING about websites, how to create one or how to get one up and running, but somehow, I did it!

Karens Kottage was launched in the spring of 2002.. Sales were very, very slow at first (I think I made $200 the first year. lol).. To supplement my income, I cleaned houses a few days a week, which is one of the hardest jobs on earth! Many koodo's to anyone out there who cleans houses for a living..

After a year or so, I was making enough from sales that I quit the cleaning business and focused on my craft business full time.. It's been a heck of a ride since then.. I love what I do for a living and never get bored! 

I still had the problem of finding good fabric for the dolls, though, especially dolls of ethnic skin tones.. Eventually, after a lot of research, shopping and questions, I discovered craft velour and doe suede fabrics, the PERFECT fabric for my dolls... I now buy it by the bolt in a range of colors suitable for every race! 

Karens Kottage (www.karenskottage.org) is now the mama website to quite a few others, including Karens KidsKarens KatsSpecial Angel DollsSweet Pea Doll ClothesSweet Pea Girls and Karens Kandles...

Curly Doll Hair At Last


I have struggled with creating curly hair styles for the doll's for years.. I tried everything under the sun to get yarn to curl permanently, but nothing seemed to work long term.. 

At one point, I was using a stiffening product intended for ribbon and then rolling a few strands at a time with perm rods.. This process was very, very time consuming and MESSY... It required the doll to sit in front of a fan for days so that all the yarn could dry... But worse than that, the curls didn't stay indefinitely...Sometimes I'd get all done, dry their hair style only to take out the perm rods and discover the "perm" hadn't taken, so I'd have to start all over..  To top it off, the product I used has been discontinued...So there went the only way I'd found to curl yarn.. 

I've been determined to figure out a good way to create curly hair styles.. After all, I'm a curly head!! I wanted my dolls to have the choice to be curly heads, too..

Finally, this past December, while recuperating from Christmas orders (lol), I finally found a tutorial on "boiled yarn".. I don't even remember if it was a tutorial for doll hair, all I remember is that it gave a way to curl yarn.. I tried it, it worked, I was amazed, started boiling yarn left and right and have created a whole bunch of ready made Lil Kids with cute curly hairdo's. 

It's such an easy process, I'm wondering why I never figured this out before now!! The yarn is wound around something like a metal knitting needle, or small wooden dowels.. It's best to wrap it tightly and scrunch it up so you can get as much as you can on each needle or dowel.. The end is then slipped through the last ring of yarn and pulled tight to keep it from unraveling.. From experience, I can tell you the knitting needles are a bit easier to deal with.. When scrunching the yarn up on the wooden dowels, I ended up getting a couple of slivers..ouch...


You then take boiling water and pour it over the wound yarn... I line all my dowels of yarn up in the kitchen sink and then douse them with boiled water from my tea kettle...I let them sit for a few minutes so the extra water drips away, I squeeze any excess out (which has cooled enough by now to touch), then I place them on a cookie sheet or pizza pan.. I use the pizza pan pictured below because it has little holes in the bottom of the pan which seems to speed up the drying process.. 


I then place the dowels of yarn in a preheated oven (185 degrees) and set the timer for 40 minutes.. When it goes off, I turn the oven off but leave the yarn in the oven while it cools off... After an hour or so, you can remove the knitting needles or dowels of yarn and start pulling it loose.. You'll have a bundle of curly yarn!!  I've found that it takes about a dozen needles worth of yarn for each head of hair..


 I used a mohair blend yarn for this kiddo.. Her hair turned out soft and bouncy..
 This cutie's hair was done with Simply Soft yarn.. The tiny little curls turned out so cute...
 This little guy has curls all over his head.. This was done with Red Heart classic yarn.. His sister, shown below, has the same curly head of hair made from the same yarn...


This seems to work with pretty much any kind of yarn, however, I have discovered that mohair yarns or yarn with a mohair mix in it seem to curl really well and are super soft. However, I think the curls turned out pretty with all the yarns I tried.. 

New Batch of 16" Lil Kid Dolls


I've been trying to get a new batch of 16" Lil Kid dolls done since before Christmas!! I finally finished a bakers dozen and have just added them to the website. All 13 of them can be seen on the Lil Kid Dolls page... 

I was so excited over finding a great new way to add curls, that I ended up making a LOT of dolls with curly hairdo's...
These two look like sister and brother!


 I've added quite a few other new hair styles, too, plus many brand new outfit styles... 


I love the look of french braids but it's a little tricky to get the look using yarn.. I kept playing around until I finally got the look I was hoping for... 


This little one has ribbon running through her hair. Her ribbons match the organza flowers on her tutu skirt...


These braids turned out super cute and SOFT. I used a mohair blend yarn that gives her a nice highlighted hair look.
I had a lot of fun creating this batch of Lil Kids. 
Please stop by and see all 13 new dolls..
Hope they'll bring a smile to your face..
Have a great day!